Wednesday, October 21, 2026

Tuesday, October 20, 2026
15 Vehicles That Only Make Sense Once You’ve Actually Owned One – Vehicle HQ
Automotive fans will probably find that more than one of these is already a favorite … https://vehq.com/vehicles-make-sense-owned/
Monday, October 19, 2026
The Trump Card: Zilog Z8000 Coprocessor card for the IBM PC – Dr. Scott M. Baker
https://www.smbaker.com/the-trump-card-zilog-z8000-comprocessor-card-for-the-ibm-pc
Sunday, October 18, 2026
M1 Garand Firearm Maintenance: Part 1 Disassembly - Brownells
The first in a series -
Comments on FB - if slides, grease it, if it rotates, oil it.
PC-based IBM mainframe-compatible systems
Mainframe emulator cards for PCs are essentially no longer available or practical. It doesn't appear that any PCI or PCIe bus cards were ever produced, and the ISA cards don't show up on eBay.
This is presumably because the software emulators work well enough:
"Popular Software Emulators
- Hercules: A widely used emulator that can simulate IBM mainframe environments, allowing users to run various mainframe operating systems. https://en.wikipedia.org/wiki/Hercules_(emulator)
- QEMU: Another emulator that supports running mainframe hardware, particularly useful for Linux environments." https://en.wikipedia.org/wiki/QEMU
https://www.jaymoseley.com/hercules/ -
| "Hercules by itself only provides the implementation of the hardware instruction set of IBM mainframe architectures, S/370, ESA/390, and z/390. In order to utilize Hercules, it is necessary to acquire either an operating system or a stand-alone program that has been designed to run on IBM mainframe hardware. Like the hardware itself, the operating system software that runs mainframe computers is prohibitively expensive. However, there are older versions of several of IBM's popular operating systems that are now classified as Public Domain, meaning that they may be obtained and utilized freely. | |
[Click for larger image/information] |
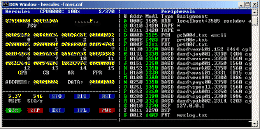
| The Hercules community runs a variety of vintage IBM mainframe operating systems which have been determined to be in the public domain, including MVT release 21.8, MVS release 3.8, DOS/VS release 34, and VM370 R6 (all from the 1970's time period). Linux/390 by its very nature is publicly available. Under the disaster recovery provisions of their licenses, some have successfully run more recent operating systems on their Hercules enabled systems." |
#3270, #MVS, #IBM, #REXX, #JCL, #TSO, #SPF
Wednesday, October 14, 2026
What can I use a Thin Client for at home
My main desktop PC has enough power to virtualize Proxmox, a media server, and an AI engine, along with some other tools. It's being wasted just surfing the web and playing Internet radio. I'm looking at setting up a Thin Client or two that can connect to this desktop and perform useful work.
"A thin client is a compact, low-power endpoint designed to display a virtual desktop streamed from a central server, cloud workspace, or remote PC. Instead of running apps locally, it offloads the heavy lifting to a remote machine and just handles the display, keyboard, and mouse on its end. "
https://www.thinvent.in/a/thinclient-at-home (vendor site):
Low Power Bills: A thin client consumes as little as 5–10 watts — compared to 60–150 watts for a desktop PC. Over a year of typical use, you save a significant amount on your electricity bill.
No Noise, No Heat: Many Thin Clients use fanless designs. It is well suited to a bedroom, study, or living room where noise would be disruptive.
Little to Break or Maintain: Thin clients use solid-state flash storage and have few or no moving parts.
Virus and Malware Resistant: Thinvent's Thinux OS is a read-only embedded Linux. Users cannot accidentally install malware or adware on the read-only system.
Small and Unobtrusive: A thin client is roughly the size of a thick book. It fits behind a monitor, on a shelf, or in a TV cabinet. Many models include VESA mount brackets so they can be attached directly to the back of a monitor.
Common Home Use Cases: Remote Desktop and Work From Home
Everyday Computing: Web browsing, email, video calls (Zoom, Google Meet, Teams), YouTube, streaming, online banking — all of these work well on a thin client. For most home users who do not edit video or play games, a thin client handles everything they need.
Children's Study Computer: A thin client running a read-only OS makes a good study computer.
Home Media Center: Connect a thin client to your TV via HDMI and use it as a media player. Stream from YouTube, Netflix, or a home media server. The silent fanless design suits a living room setup.
https://www.reddit.com/r/HomeServer/comments/znhpi5/thin_client_for_use_as_a_low_budget_home_server/:
"Don't limit yourself to thin clients - consider older generation USFF PCs. I run a trio of HP 260s as my hypervisors - collectively they draw about 20W, but each one has 8 or 16GB RAM and either a SATA HDD or SSD. I got 2 of them together for about £30 each. The EliteDesk 800 series is the successor and should also be available pretty cheap.
I don't think you'd get a hypervisor on a thin client with a Celeron - performance would likely be very poor. My HPs are Haswell i3s and can crunch numbers if needed. The N2807 in the 3030 you picked is of similar vintage (2014) but does not have VT-d, whereas the i3-4030Us in my HPs do.
You'll also be very limited on RAM with a thin client - the RAM is generally not upgradable and quite low for the rest of the system. USFFs are usually socketed."
" Well, thanks for the input people. I think I narrowed down to this two:
- Dell Wyse Thin Client Dx0Q
- HP t620 Quad Core
The HP one comes with a SSD and the Dell does not, and both don't come with a power supply so I will need to buy it separately. In this regard the HP one wins, because of wide availability of PSU and the power supply of my HP notebook works with it.
RAM on the HP can be expanded up to 32 GB according to Parkytowers site: https://www.parkytowers.me.uk/thin/hp/t620/ and is easier than the Dell Wyse Thin Client Dx0Q: https://www.parkytowers.me.uk/thin/wyse/d/dx0q/
I plan to upgrade the SSD and RAM in the future if performance is good enough to merit an upgrade.
But my doubt is how much storage I will need to host the hypervisor minimum?. I've read Proxmox needs 3GB for the OS itself and XCP-ng needs 46GB to 70GB minimum. I don't know if this thin clients can boot from external attached storage through USB3 for example?"
"I booted my T620 off a thumb drive to load Debian/Octoprint on it, so it will boot from USB. I also upgraded the internal SSD to a 250GB."
Raspberry Pi prices are out of hand, and this $50 thin client makes a better home server:
https://www.xda-developers.com/this-mini-pc-is-cheaper-and-better-than-a-raspberry-pi-for-homelabs/
https://www.howtogeek.com/the-50-pc-thats-quietly-replacing-raspberry-pis-in-homelabs/:
"The thin client I purchased is an HP t620 model that was available for around $15 without memory and storage. It's similar to the Raspberry Pi Zero 2 W's original price. I purchased an 8GB DDR3 memory stick along with a 128GB SATA SSD for almost $35. So, I had to pay around $50 for a complete, usable computer."
"... any SBC with one-gigabyte memory, no matter how fast its bandwidth is, will barely suffice considering today’s standards. If you compare it to my setup, which has 8GB of memory, the price seems horrible. The 4GB memory models of both Raspberry Pi boards cross the $100 mark, and this is without any peripherals."
"My HP t620 has better connectivity than most of the SBCs available today. It has multiple USB ports, Ethernet, display ports, and all the other necessary connection inputs, along with a speaker."
"The thin client supports M.2 SATA SSDs of multiple form factors and can handle up to 16GB of RAM in a dual-channel configuration. So, I can upgrade the storage without purchasing additional connection modules, as I need for an SBC. I can also boost the memory capacity when my self-hosted setup demands more. As you expand your self-hosted tool library, the additional memory capacity makes it feasible to use the same computer for more demanding tasks."
"A thin client like the HP t620 won’t use more than 15 watts under stress, and that’s less than one percent of my annual bill amount."
"Plus, with a thin client, you can install any modern operating system, from Linux to Windows, which is something that the Raspberry Pi just simply can't compete with."
10 Best Thin Clients (October 2026) Tested & Reviewed: https://www.thirstybear.com/best-thin-clients/
12 Best Thin Clients (October 2026) Expert VDI Reviews: https://acfc.org/best-thin-clients/
"The best thin clients today are not the bulky Wyse boxes from a decade ago. They are quiet, fanless mini PCs that sip 4 to 15 watts of power, boot in under 20 seconds, and connect cleanly to Citrix, VMware Horizon, Azure Virtual Desktop, and Windows 365."
"The 6th generation i5-6500T processor handles dual 4K streams over HDMI and DisplayPort without breaking a sweat. I had two spreadsheets, a 1080p video call, and three Chrome tabs open across both monitors and never saw the CPU climb above 35%. Sixteen gigabytes of DDR4 RAM is generous for a thin client and gives you headroom for heavy browser-based workloads."
"The 256GB SSD is fast for boot times but tight for anything beyond thin client duties. If you plan to use this as a general productivity machine, swap in a larger NVMe drive later."
"The integrated Intel HD Graphics 530 is sufficient for knowledge worker workloads including Microsoft 365 apps, web based SaaS tools, and light content editing."
Thin Clienting at Home (March 2010): https://www.instructables.com/Thin-Clienting-at-home/
"A thin client is basically a stripped down computer that is used as a window to the Terminal Server, some use complex platforms to connect to the server, but today I am using RDP because that was the easiest for me (and cheapest)."
Thin Client examples: https://forums.servethehome.com/index.php?tags/thin-client/:
Subscribe to:
Posts (Atom)