https://www.instructables.com/Setting-Up-a-Radial-Arm-Saw/
"Power saws go out of alignment through the vibration that accompanies use. Also, radial arm saws do not like to be moved, and settings will probably drift when one is moved. But, a lot depends on how much precision the user is looking to have from his saw. If you plan to use the saw only to cut 2 x 4s to length, the accuracy you need is not the same as if you were doing fine cabinetmaking with the saw."

"This is my homemade stand constructed of 2 x 4 pieces and plywood cleats. I made it to take down easily, so the brace pieces attach with corner brackets and wood screws. I made two tool trays that rest on cleats inside the frame assemblies of the stand."
"Use a good square to check the travel of the blade so it is at 90 degrees to the fence. Pull the motor down the length of the arm. The blade should lightly touch the square the length of travel. Flip the square over and check from the other side of the blade, too."
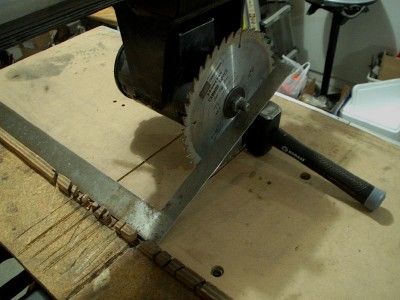
""Heel" means the blade moves through the wood cocked a little to one side. Heel results in burn marks on at least one side of the cut. You can also detect heel when the blade kicks up splinters as it exits the cut at the rear of the cut.
Use a framing square to check for heel. Set one leg against the fence. Bring the other leg against the saw blade. If there is no heel, the square and the saw blade will meet consistently from the front of the blade to the rear. If there is a "V"-shaped gap, the blade has some heel that will need to be removed."

No comments:
Post a Comment